Himalayan salt saunas have become a striking wellness trend. They combine the traditional benefits of dry heat with the calming glow of Himalayan salt bricks. Whether you’re interested in creating one at home or as part of a spa project, this guide breaks down the practical steps, design considerations, and key safety measures to make your salt sauna both beautiful and functional.
Step 1 — Decide on Sauna Type
Himalayan salt walls are decorative and pair best with **dry saunas**:
- Traditional Finnish (electric heater + stones):** Classic high-heat experience (80–100 °C).
- Infrared sauna:** Lower air temperature, gentle radiant heat, and less humidity — which is easier on salt bricks.
> Tip: Avoid steam sauna setups. Salt is hygroscopic (absorbs water), so high humidity will shorten its lifespan.
Step 2 — Build the Sauna Shell
- Framing: Standard wood stud construction.
- Insulation: Mineral wool or fiberglass for heat efficiency.
- Vapor barrier: Staple aluminum sauna foil to studs, sealing seams with foil tape. This prevents heat loss and protects framing.
- Interior cladding: Use tongue-and-groove cedar or hemlock for a natural finish.
Step 3 — Ventilation Setup
Good airflow prevents overheating and ensures comfort:
* Place air intake low on the wall, near the heater.
* Place exhaust vent high on the opposite wall.
Aim for a gentle convection loop that refreshes the air without drafts.
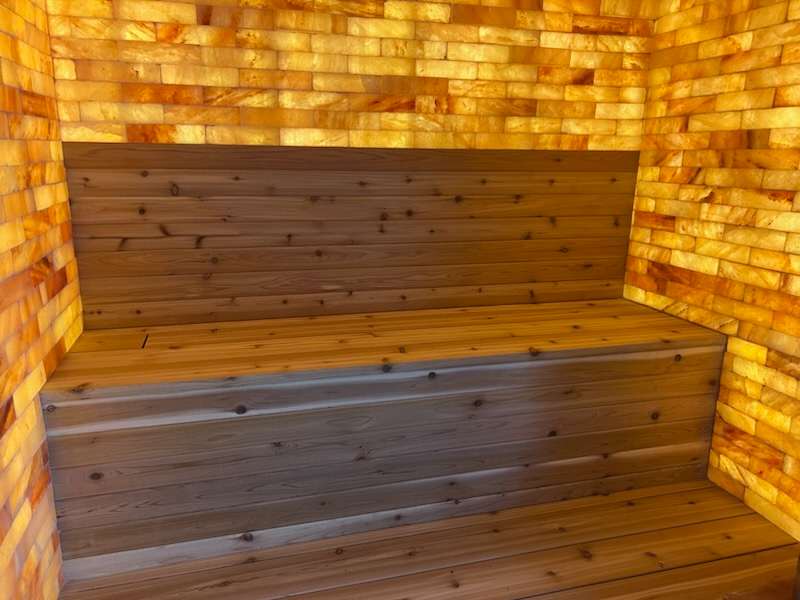
Step 4 — Integrate the Himalayan Salt Wall
- Brick installation: Salt blocks or tiles can be stacked in stainless steel channels or mounted as pre-fabricated panels.
- Moisture control: Keep the salt wall away from direct splashing. Always allow the sauna to dry after use.
- Lighting: Install heat-rated LED backlighting behind the salt to create the amber glow.
- Hardware: Only use 304 or 316 stainless steel fasteners to avoid corrosion from salt exposure.
Step 5 — Heating and Electrical
- Heater size: Rough guide is ~1 kW of heater capacity per 45–50 cubic feet (1–1.5 m³) of sauna volume.
- Circuit: Dedicated breaker sized to the heater, installed by a licensed electrician.
- Safety: Follow CSA/UL listed heater guidelines for clearances and controls.
Step 6 — Finishing Touches
- Benches: Use cedar or aspen wood; avoid treated lumber.
- Controls: Modern heaters can be paired with digital thermostats and timers for convenience.
- Ambience: Consider soft under-bench lighting to complement the salt wall glow.
Maintenance Practices
- Run the heater for 10–15 minutes after each session to dry out salt surfaces.
- Keep humidity below 60% inside the sauna.
- Replace any corroded hardware promptly.
Final Thoughts
Building a Himalayan salt sauna is as much about design as wellness. The warm, glowing salt wall creates a relaxing environment, while the dry sauna itself delivers benefits backed by strong research — from improved cardiovascular health to stress reduction. While the salt wall’s health claims are less proven, its visual and atmospheric impact is undeniable.
Click here to get a quote to convert your room to an authentic Himalayan salt sauna.